23 November 2015

Tanks-Giving Saturday (part 2)

After the awesome game of All Quiet on the Martian Front, everyone who was left in the house had a bite to eat and moved on to the FOW table. We had eight players, four a side. The scenario was a simple shoot-em-up Meeting Engagement between a British Guards Armour Company and a Heer Panzerkompanie laden with Panthers, Hezters, StuGs and a pair of Luftwaffe 88's. Mike Baker commanded the British side of the table, while Alan barked orders to his German platoon leaders.

I was given a platoon of 4 Shermans, two Vs and two VCs, aka Fireflies with what we like to call "the big gun." I also deployed some rather bored AA platforms. Aside from a bunch of tanks, our force also had a good-sized Recce element with armored cars and UCs.

We Brits get super-aggressive right away. Since each side was trying to capture an objective we decided to get out there and do it!

Rob, Mike H and Mike Baker. Baker looks pretty confused by that tape measure.

Hans Rudel makes a pass but some furious AA fire from the platoon leader's tank forces him to break off!

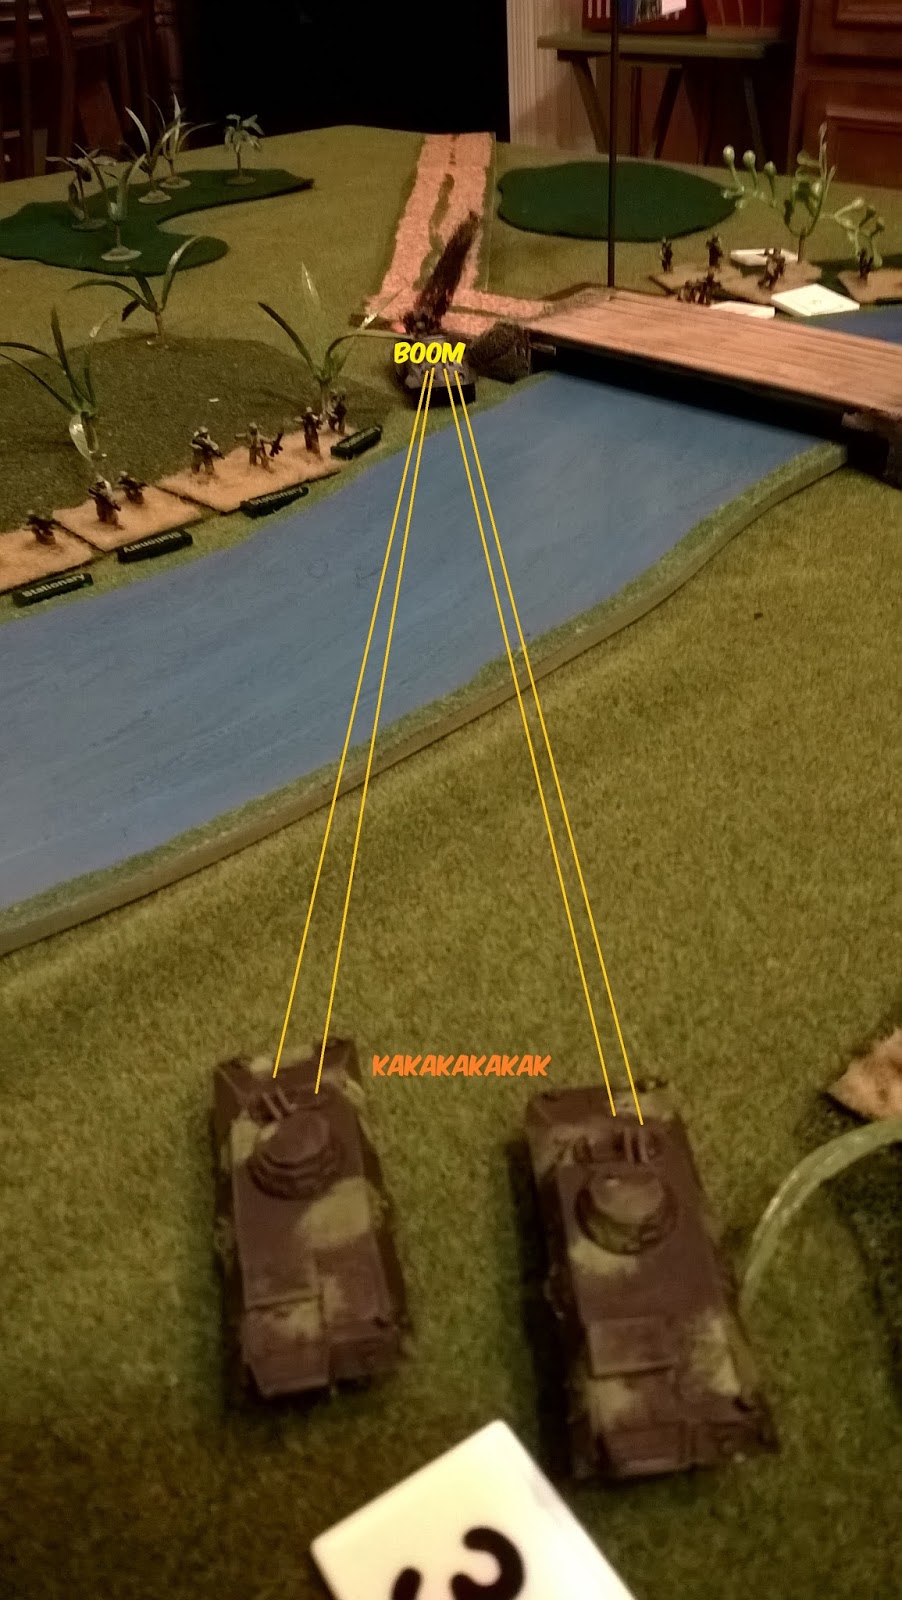
A turn on and my side of the table is already a mess! One of my tanks was knocked out by an 8-rad mounting a PaK40. Retribution was swift and it was brewed up by one of Dominic's tanks. Dominic also knocked out one of his dad's StuGs with a long-range shot from a Firefly. I managed to bag another StuG with my own shooting! 

One turn more and we've bagged a third StuG! I was exposed to the Hetzers in the back but figured the risk was worthwhile. The wrecks in between were adding some concealment for me.

Well, OK. Not enough concealment. There goes my second Firefly. Nice shooting, Z.

With no Germans close enough to contest the objective, I get Mike's attention and ask him to send his Recce guys in to press the issue. We get an armored car and a UC close enough to piss off the German side of the table. HUZZAH! Be aggressive and decisive!

Way over on our left, Hans finally bags a Sherman. Good for him.

Another turn or so and the writing was on the wall for Fritz & Co. The Hetzers lost two of their platoon, The SutGs had been neutralized, MIke & Mike's tanks had flanked the hell out of the Panthers on the far side of the table and were rolling up the German baseline. 

Wow. I can't remember ever seeing German tanks get worked like that in a game of Flames. British Shermans typically can't compete but that day, the stars aligned and we managed to get a solid victory. We bagged the objective and thoroughly smashed the German tanks. As much as I dislike FOW, it's one of those games that everyone seems to know the rules for so a group of eight people can sit around and push tanks for two hours without having to crack a rulebook.

Mike, thank you so much for hosting this game day - I had a great time and I think everyone else did too.

Now... only two other AARs to work on. I got in a lot of gaming lately.

22 November 2015

Happy Tanks-Giving! (part one)

Mike (and his wife) kindly hosted a game day at his place yesterday which was rather well-attended and a lot of fun! He had two tables set up which became battlefields for All Quiet on the Martian Front and Flames of War. I rode down to Waycross (a two hour drive) with Zig and we both game AQMF a go first, which was a good thing because there were at least eight people clustered around the FOW table. I'm not sure I understand that.

Mark supplied the minis and rules and took command of part of the Martian army. Ziggy commanded the other half of the Martians while I took on the role of general of the Ohio National Guard.

My steamers deployed. That's a fancy name for "tanks." Infantry is in hidden deployment. I had five platoons and ten markers. The odd-numbered markers were actual troops. There are three standard Tripods to my right side - the silver ones. Ziggy's three darker Armored 'Pods are on the left. Their mission was to get past my force and on to Cleveland! President Taft needed us to halt their advance here in Canaan.

Martians roll out!

It didn't take long for one of my turrets to get melted.

Mark's middle 'Pod takes some early damage, fouling its control mechanisms.

One of the great many nasty tricks the Martians have is to sweep their heat-rays, hitting multiple units. Here, a turret and infantry unit get warmed up. Both managed to survive!

Z in his most natural pose.

An early success! The damaged Tripod falls to the ground after being pounded by a hail of gunfire.

My left side, the center of Canaan, is in heap-big trouble. The Armored Tripods are deflecting all incoming shots. Nothing will stick!

An Armored Walker and Mk.III face off. This didn't go too well for my steamer.

 The face of evil. Model's-eye-view.
Two more steamers fall under a heat-ray-sweep. The Martians were always quick to clip a house with their sweep attacks. Scum!


A overview of the situation. My heavies on the left have been wiped. My command vehicle has failed its morale and is retreating. The two standing 'Pods on the right however have been immobilized by bikers with tow-cables. (Think snow-speeders v AT-ATs). I'm still unable to do any damage to the heavy walkers.

The thing with the tennis ball launcher starts dropping green goo on my bikers.

Feh.

More steamers are destroyed by a sweep attack.

Stupid dice. I'd been struggling all game trying to damage the Tripods, primarily because after they'd been hit (the easy part, generally 6+ on a d10), I needed 9's and 10's to damage them. Then I roll this for a to-hit-roll with a trio of 4-inch guns! WHHHHHYYYYYYYY! Can I save that for a damage roll?

A Mk. 3 rolls up and blasts away at a Tripod. The 4-inch guns don't make an impression but a lucky hit from the machine-gun kills the 'Pod commander and it stumbles, crashing down. Hurrah!

The National Guard commander is ecstatic.

The last walker on the right side is surrounded and everything fires at it. Another lucky hit from a machine-gun is what does it in.

But this time the reactor is also hit! A massive explosion! I was lucky to only lose one infantry stand in the conflagration.

The game was over. Ziggy's unstoppable Armored Tripods made it past my units and on to Cleveland. I hope they've started getting in those boats and heading to Canada!

All Quiet is a nice game. It's nothing ground-breaking, being a descendant of the GW method. There was only one game mechanic that I really liked that I hadn't seen previously - each unit lost to a side results in a -1 to that side's initiative. Once a side starts getting pounded, the other side can get some real momentum going.

The game itself was a great time. Even though I got run over roughshod, I was able to take out half of the enemy units. To take the low road, my dice were crap and Ziggy's were unbelievably good. I'd play AQMF again in a minute but the pricey rulebook and minis are enough to keep me away.

Next on the agenda was Flames of War... that'll be the next post.

19 November 2015

Star Fleet Battles November Game AAR - Convoy Raid

The new storyline begins! Finally. Last month I was sick on SFB Sunday so this game got delayed. We'd moved along to the East Side and will be featuring Romulan, Gorn and ISC ships in the upcoming games. Orions are the easiest to write for, and David wants to use them, so they'll be staying in the mix too.

Our story begins with a Romulan convoy of mining ships and their escort carrier transiting out to Bundag Field - an enormous asteroid field mined by Romulan, Gorn and ISC companies. All are preyed on by Orions so the governments keep third-tier ships close by for assistance.

Agents from the Orion Black Sun cartel have been placed on the three ships. They've been tasked with putting transporter beacons on the ore-processing equipment aboard the freighters. Midway through the transit, convoy raiders are to arrive to snatch the gear. The agents aboard are to simply remain incognito.

So, the Romulan convoy is this:

2 Small Prospecting Freighters
1 Large Ore Processing Freighter
1 War Hawk Carrier with 5 G-SF

The Orions Raiders are:
1 DBR with 2 Plasma-D, 1 Ph-1 and 2 Disruptor
1 Free Traitor

Both Orions start cloaked. The Roms need to travel the rest of the map, plus one additional map to escape. The Orions are trying to transport as many "Works" boxes off the freighters as possible,

On with the game.

Initial Romulan deployment. I was graced with the three freighters. Mike drove the carrier and fighters. David was the pirate captain.

The Big Pig and two Piglets!

The cloaked pirates arrive!

The convoy turns away from the persistent sensor anomaly. Being Romulan, they're familiar with the intricacies of cloaks!

The War Hawk and her litter investigate the sensor shadow. My piggies continue fleeing. We're not getting paid to fight.

Orions start pursuing my ships. I've dropped three shuttles for them, intending to tow two with Big Pig, but realized that at speed 13, I'll death drag them. The War Hawk picks them up for me. Thanks, buddy!

Slowly making way. The small freighters' best practical speed is 9. Ugh. The large freighter maxes out around 17 and has a VERY slow acceleration. I decide to split my ships, forcing the Orion to abandon one or split his force. The escort continues to hound the Orions who are now hesitant to de-cloak. We're nearly through turn 3 at this point.

The ships are really all over each other now.

The Big Pig is feeling good about itself, having gotten good separation. We're partway through turn 4 now.

Turn 4, Impulse 8 - Captain Jalad decloaks the Double Raider. The next five impulses are very tense as all parties prepare to fire.

The Romulan fighters strike hard and fast!

Then there are plasma torps everywhere! My small freighter is really in for it.

The pirates account for a fighter.

Brace for impact!

I didn't document it, but the OFT decloaked shortly after the DBR to add its phasers to the fight. One other fighter was destroyed in the fight by it, and it was useful for anti-plasma duty.

By the end of turn 5, the pirates were a mess and my freighters were getting away. The DBR did manage to transport one Works box off my smashed freighter, but was not in a position to flee with it. We called the game there.

The War Hawk pulled alongside the big Orion ship and ordered their surrender. This wasn't the first time Captain Jalad had a bad run. He ordered his men to stand down. He still had agents aboard the freighters - this wasn't worth dying over, not yet anyway.

That game was quite different, for sure. Poor David - he changed his mind halfway through which was his undoing. We had a lot of discussion about the right way to play it from the Orion side. From dumping out a cloud of shuttles to timing the de-cloak, or simply de-cloaking immediately, going to speed one-million and trying to hit the convoy as quickly as possible. Regardless, I think trying to kill the fighters early is key. They carry too much firepower and with their speed and agility, can sit right on top of the freighters for ever, Food for thought...

Even though I didn't do much, I enjoyed running the freighters - you really appreciate real warships after pushing three of these monstrosities around for five turns! Mike (and David) gained a lot of respect for the firepower that Plasma-D fighters carry. It's really a very nasty short-range punch that's very had to defend against.

Until next time, be well!

18 November 2015

New Toy and Update

I got this cutie-pie in the mail today:


It'll make a fun addition to the Litumsian rebel forces. Like the MiG-21, I'll need to hand-craft some ordnance. The Jaguar really is a good looking plane.

In other news, I've completely avoided writing the AAR from last Sunday's Star Fleet Battle game. It was a weird game in no uncertain terms. I rolled two dice all game. 5 turns. 2 dice. Mike and Dave rolled a bunch of dice. I rolled two. Maybe tomorrow. I'd do it tonight but don't have the pics handy. As weird as the game was, it was chock-full of character and flavor. I was particularly inspired while writing the follow-up scenario for December's game and am looking forward to that one!

17 November 2015

StarDust Update


My StarDust Space Combat game is getting an update! I'm nearly done with the 1.1 changes which are pretty massive. Gameplay remains the same, I've primarily tidied up a couple of things that were unclear (my biggest pet peeve) and added a large assortment of new weapons and special equipment. I've expanded the existing fleet lists and added an entirely new fleet. Anyone who has purchased the original can get the update for free when it is complete. All I've really got left to do is to complete the new, more beautiful, ship Data Cards. The version 1.0 ones are simply functional with no thought given to making them look good. The new cards will be something I'm proud to show off. If I can jam eight of the new cards onto an 8.5" x 11" sheet, I'll be very happy.

And to the folks who purchased 1.0, thank you very much!

14 November 2015

AAR - Sabre Squadron in Imagi-Nations Africa

I finally put Sabre Squadron on the table top this evening. I am pleased with the game, as much of it as I got try anyway. On with the show...

The setup:

The MCC rebels are running a convoy north to M'podo. Since the area they are traveling through is contested, they're expecting trouble. As they approach the bridge over the Gama Boga River, something startled a flock of birds. The lead trucker noticed this and alerted the convoy to expect trouble ahead. Troops dismounted and spread out. The escorting armored cars went off-road hoping to get around the flanks of whatever forces the WPA had ahead.

The forces:
MCC Attackers (Poor Morale) - 3 platoons of 4 automatic rifle teams, 1 RPG and 1 LMG.
                            3 V100 Armored Cars with twin turreted .50 cal HMGs
                            4 Trucks

WPA Defenders (Average Morale) - 2 platoons of 5 automatic rifles and 1 bazooka.
                                                          1 M8 Greyhound Armored Car with 37mm gun and HMG

The MCC has to break through the roadblock and exit trucks off the far end of the road. The WPA is simply try to stop the convoy.

My seven-year-old son volunteered to play the MCC guys since they had more stuff. I played using the WPA.

The table layout. My starting platoon and armored car are deployed. My second platoon is not yet deployed and won't be until my first turn. The Militia guys will be entering from the near table edge.

The Militia Campaign for the New Congress convoy (minus their trucks)

The MCC kid-in-chief. His forces have just entered the table. He had just finished making a "throat cut" gesture at me. I was giving him advice on troop deployment. My Armored Car had a very commanding position down the road which would be a real gumball-alley.

My second platoon is deployed. Both sides of the river are covered. All of my infantry is in light cover and because it hasn't moved or fired, can only been spotted from 6 inches away. For the near-term, my infantry is in great shape.

My Armored Car reaches out and brews up an enemy AFV! The convoy is now in line formation off the road. The infantry advances slowly through the cover of the woods. The MCC commander learns that he'll have to keep his vehicles out of sight of my Greyhound until he can get shots on it.

A view from my end. My AC was in a terrific location. Too bad I didn't have three more of those things!

Turn 4. The Greyhound snaps off some fire at the troops to the left of the road, killing a stand! Godzilla makes a brief appearance.

Turn 5. I suggest to Cameron that he take some shots at my Armored Car. The machinegun fire is impressive and Neutralizes my Armored Car! There is also discussion about putting the trucks back on the road and running the gauntlet with them, so they make their way back onto the road and prepare to do their best Mad Max impression. At this point, the lure of cartoons on TV was too much for him and he handed the reigns to me. I continued the game solo, following his battle plan.

My platoon east of the bridge fired at the lead truck, causing enough damage to wreck it! On the other hand, they'd given their position away and would now be receiving enemy fire!

Which is exactly what happened. The MCC platoon opposite them fired a steady stream into the dictator's troops, suppressing and neutralizing some teams.

The blasted Commandos take advantage of my Armored Car's neutralized status and hammer it with heavy-caliber rounds, destroying it. This is not good!

The WPA troops nearest them fore at the infantry in the woods causing some disruption and a bazooka is fired at one of the ACs but misses wildly.

The trucks begin crossing the bridge. I ruled that only one truck could cross the bridge at a time (since it is a rickety wooden thing).

The rebel troops in the woods fire back at the government soldiers and cause significant casualties! Half of the platoon is eliminated.

But the lead halftrack is hit by a bazooka rocket and a hail of automatic weapons fire causes the driver to bail out of the blue truck, blocking the bridge! The driver of the green truck pulls it off the road trying to get out of sight!

The rebel rabble cause further misery, two more stands gone from the platoon opposite them! The platoon at the top of the picture is falling back voluntarily - they'd just been victimized by a tremendous round of firing.

The Armored Cars spin about and finish off the platoon. That bazooka team had missed all of its shots - three or four - at them!

But my other bazooka team again blasts another truck. The blue one goes up in flames.

With no way to push the wrecks out of the way and three of the four convoy trucks destroyed, the MCC forces pull back. A bloody victory for the Dictator's army.

That turned out nicely! I was pretty happy with the Sabre Squadron rules. Being a first-run, there was a lot of rules flipping, but that's normal. Morale and motivation tests, unusually, were an easy matter to pass and neither force was in any danger of collapsing at any time. Lucky rolls, really.

I have two nagging questions that I'll probably take to their forums.
1) Can small arms fire at and affect Soft Vehicles? I ruled that it could during this game.
2) Do multiple Suppressed and Neutralized results on a model have any sort of cumulative effect? Does a second "S" become an "N?"

Aside from those minor points, I liked how the game moved and will definitely put it back on the table with more toys - tanks, guns and artillery!

Tis The Season

 The season of the witch, that is. I'm on another tangent right now and have dipped my toe back in the 1/72 pool. The models are from Re...