Tanksgiving 2018 - A Pair of AARs
It's that time of year again (funny how that happens), time for Mike to host a TANKSgiving get together at his place. Zig and I made the trek to Waycross yesterday to eat, drink, throw dice and push models for a few hours. I had put together a Cold War Commander scenario a week or so ago at Mike's request, so I took my 6mm West Germans and WarPac along for the ride.
When we arrived, Mark J was setting up All Quite on the Martian Front and Mike was setting up an entirely too huge Ogre layout. When it became apparent that Mike would only have four for Ogre, we cut the board's dimensions in half and ended up with a much more manageable game. The scenario was this:
There were seven reactors scattered about the battlefield. Each team had to recover as many as possible and exit them off their table corner. Reactors could only be picked up by unarmed and poorly protected transport trucks.
Mike had four small slightly different forces set out so each of us simply took one and we were off!


That was a fun scenario - small manageable forces, interesting and challenging victory conditions and enough elbow room to allow for proper maneuvering. We all really enjoyed the game.
After the first session games were cleaned up, Mike and I began setting up for round 2. He was setting up an Eastern Front Blitzkrieg Commander game while I got my CWC stuff ready. The scenario I'd selected was "Assault" with the West Germans defending a town. They had to hold on for eight turns against a much larger Soviet force. Max took command of the FRG forces and Ziggy (a newbie to CWC) helmed the Reds.


Not longer after, the casualties sustained by the FRG defenders became untenable and they retreated south, past the still burning hulks of the T-72s. The battle was over.
A tough win for Ziggy and the Polish/Russian horde. It was set up to be a cakewalk early as the flankers arrived and Max couldn't pass a command roll to save his life. Once Max's dice problems resolved themselves, it became a much different affair. Zig doesn't often push the commie hordes and I think he rather enjoyed having a massive manpower advantage for a change. I enjoyed GMing and just keeping the game on track.
We packed up for the two hour ride back home while the WWII battle was still raging in the other room - I have no idea how that one turned out. Another enjoyable Tanksgiving get together; Thanks Mike!
When we arrived, Mark J was setting up All Quite on the Martian Front and Mike was setting up an entirely too huge Ogre layout. When it became apparent that Mike would only have four for Ogre, we cut the board's dimensions in half and ended up with a much more manageable game. The scenario was this:
There were seven reactors scattered about the battlefield. Each team had to recover as many as possible and exit them off their table corner. Reactors could only be picked up by unarmed and poorly protected transport trucks.
Mike had four small slightly different forces set out so each of us simply took one and we were off!

My red horde struggles to cross the stream but the GEVs and trucks make haste towards the nearest reactor facility.

Ziggy and Mike start scrapping on their side of the table. Ziggy's blue GEVs next to the reactor turn in a great round of shooting, causing Mike's attack to seize up.

Ziggy points something out to Mike while my first reactor grab has gone swimmingly. The truck the the fireball marker on it (lower left) is the getaway vehicle.

Mark, my opponent to the right wasn't being ignored. I had sent my squadron of four GEVs over as a distraction and it worked out very nicely. The intention was for them to cut roads slowing down the transports' escape. Mark ended up diverting a good chunk of his forces to deal with them.

A good overview of the action. Zig's blue forces have snagged one reactor and are on the way to their second on the far left. Mike grabbed one (upper left) and are on their way to taking the second in the center. My reds are on their second reactor while some of Mark's APCs and infantry skulk nearby.

SCOREBOARD!

Mark's swine ambushed my contractors removing the toxic reactor, preventing me from grabbing a second objective. Meanwhile, Mike had manged to grab his second from the center facility.

Waaaay over to the left, Ziggy has nabbed a second reactor core but Mike has sent a lone GEV to hunt it down (the green one). I've formed an agreement with Mark that north of the river we will not fight each other and instead focus on preventing Mike from scoring two objectives. You can see my one remaining GEV hiding from Mike's view behind the building.

Ziggy's second reactor is destroyed by Mike's GEV which is in turn taken out by infantry and one of Z's GEVs.

Pew pew! My GEV zips out and takes a few quick shots at Mike's truck carrying the loot, wrecking it. A glorious four-way tie! We had each nabbed one objective and the other three were all destroyed in transit.
After the first session games were cleaned up, Mike and I began setting up for round 2. He was setting up an Eastern Front Blitzkrieg Commander game while I got my CWC stuff ready. The scenario I'd selected was "Assault" with the West Germans defending a town. They had to hold on for eight turns against a much larger Soviet force. Max took command of the FRG forces and Ziggy (a newbie to CWC) helmed the Reds.

Max's setup. Nothing too crazy really. I'd have put the Marders in the middle with tanks on both flanks.

The armor arrives in force! That's 12 T-55s on the lower left and 6 T-64s + 6 BMP-2s just up from them. Max is nervous. Ziggy has held a group of T-72s for Flank deployment.

And they waste no time! Twelve T-72s roll in immediately on turn 1, deep on the German right flank. If Max was nervous before, now he had very good reason!
A Leopard and Jaguar are taken out in short order. The Leopards quickly redeploy to the other side of the wall.

The German left flank is in serious trouble as the T-64 and BMP group bursts out of the woods.

A bit of relief for the NATO forces as some air support streaks in and smashes the front of the T-72 formation. The Jaguars in the town would have felt the sting as well, had they not already been taken out. That was a little close there, Fritz!
After some terrific command / activation rolls another visit from Mr. Phantom...

Max had completely wiped out the T-72 threat on his right flank! In a blink, the whole complexion of the battle changed.

The other side of the town was still in deep trouble though. The BMPs pushed around to engage the Marders, with a large group of T-55s close behind.

I didn't take much convincing for the Marder teams to redeploy into the town. The Leopards also redeployed to help out on this side - the potato field had already been captured!

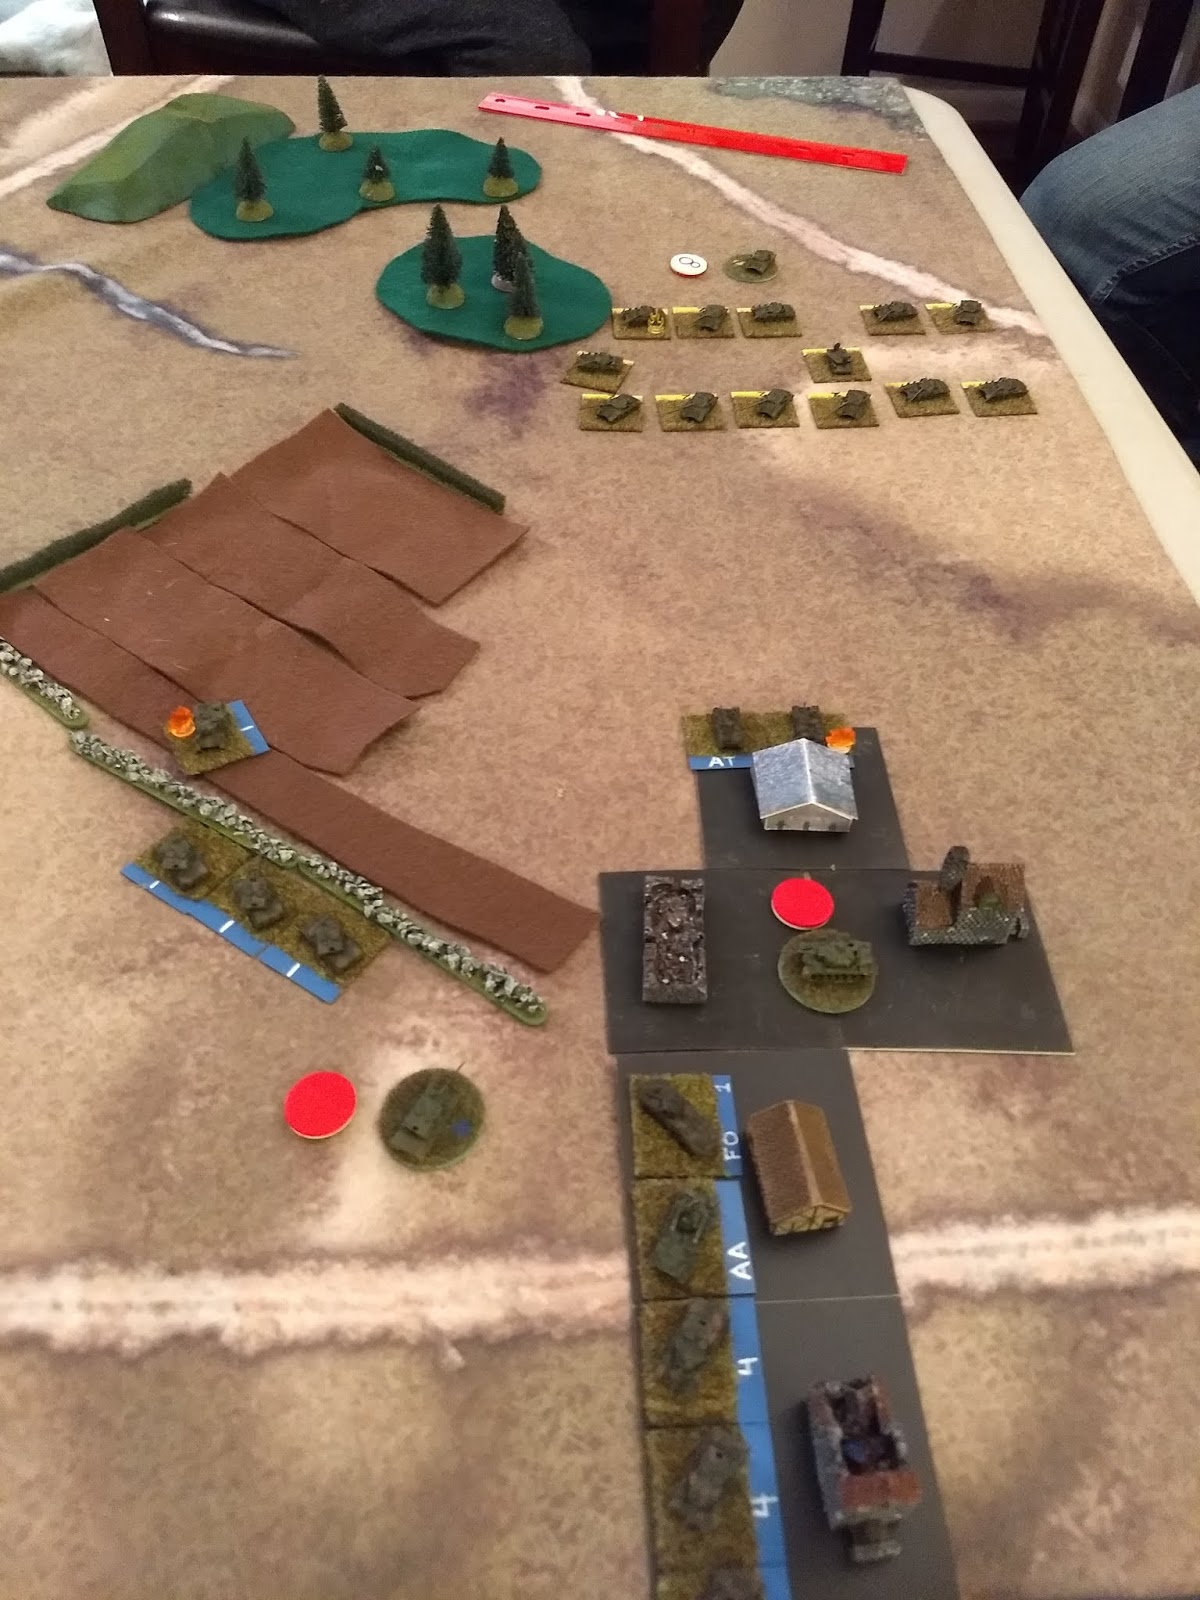
The T-55s arrive and take up positions in a gunline to winkle out the defenders. Just then, a jet streaks overhead!

The Su-17 pilot was a little edgy after having made it past the NATO air cover and dropped his bombs a bit early, giving his countrymen below reason to fear.
Not longer after, the casualties sustained by the FRG defenders became untenable and they retreated south, past the still burning hulks of the T-72s. The battle was over.
A tough win for Ziggy and the Polish/Russian horde. It was set up to be a cakewalk early as the flankers arrived and Max couldn't pass a command roll to save his life. Once Max's dice problems resolved themselves, it became a much different affair. Zig doesn't often push the commie hordes and I think he rather enjoyed having a massive manpower advantage for a change. I enjoyed GMing and just keeping the game on track.
We packed up for the two hour ride back home while the WWII battle was still raging in the other room - I have no idea how that one turned out. Another enjoyable Tanksgiving get together; Thanks Mike!


Comments
Post a Comment