Modern Spearhead
Z and I got a chance to play Modern Spearhead yesterday evening. We toned things down a bit since our last game, focusing on 1) just getting everything right and 2) getting town sector combat down pat. The MSH rules, although a far cry from Star Fleet Battles, still require a few plays-through to really get comfortable with and this is only our 5th or 6th game.
.jpg)
I took command of the better part of a Polish Motorized Rifle Regiment - two battalions of motorized rifles and one battalion of T-54s. I also had two batteries of 2s1s backing me up. Ziggy was driving a German Panzergrenadier battalion, with a company of Leopard 1s attached. He also had his ubiquitous Bo105s and 3 batteries of M109s.
We gave the Polish force 9 turns to capture the town. You can see my orders map above. 1st and 3rd battalions would basically push straight ahead toward the town while the tanks of 4th battalion would attempt a flank move around the woods southeast of town, preventing the defenders from simply massing their firepower in one point.

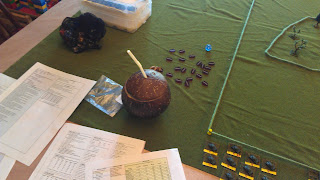
Our setup. I cordoned off a 4' X 4' area for the game.

This guy may have been much of the problem. Next time I write up orders while sober!

The Poles move out.

By turn 2, 1st battalion was close enough for the Germans to start taking pot-shots. One destroyed and one suppressed right from the get-go.
At this point, I tried a change orders on both motor rifle battalions. 3rd battalion succeeded but 1st did not. 3Bn now became stationary for two turns, waiting for the T-54s to round the woods. I was going to try to synchronize their movements a bit. 1Bn, having taken fire, failed their change orders and kept plugging away towards town.

Ziggy's one real mistake. He's always placing the helos waaaay too close to their targets. 18" is close enough to spot that many tanks! He suppressed one platoon, and the mass of MGs forces one of his whirlybirds to take evasive measures.

First battalion makes it to the outskirts.

And between the artillery and two platoons of Leopards occupying the outskirts, I could not manage to push through. 1Bn's battalion commander did make it through to a round of close combat before being dispatched quickly.

Third battalion arrives whilst the tanks are still mucking about, getting shot up by helicopters and one stand of Leopards.

Nothing like rolling your email address! I'm sure this was yet another attempt to suppress a platoon of Leopards on the east edge of town with artillery.

And by the end of turn 6, both the tanks and 1Bn had taken considerable casualties. Morale checks were taken and failed for both. I still had a very strong battalion left and the helos were about to disappear but high command ordered a halt to activity and ordered the attack to cease.
We both enjoyed the game tremendously. Zig could not believe the success he had, being outnumbered so severely. He should be used to it by now. If I had to do it all over again, this is what I'd change:
1) Swap the positioning of 1st and 4th battalions. The motorized rifles are faster and would have cleared flank much more quickly. They probably would have been ignored by the helos. The German helicopters would have been much more exposed to AA fire as well.
2) Roll the order change with the battalion that had taken fire first. Since I wanted both to do the same thing, I should have taken the tough roll first (requiring a "6"). As it stood, I had a big battalion sit still and wait for the flankers and a smaller battalion push on through and get picked on until it was gone. Sitting still or moving, I think I'd have been better off if they had both been doing the same thing.
Either way, it was fun and will be very simple to set back up and try a rematch. Good gaming!


Comments
Post a Comment